Twitch buffering or lagging can ruin your streaming experience fast. The good news? Most Twitch lag issues aren’t serious at all. They usually come from small, fixable problems, the kind you can solve in a few minutes if you know where to look.
In this guide, we’ll walk you through 10 proven methods to stop Twitch lagging. Just go down the list until your stream runs smoothly again.
In this article:
- Check your network connection
- Restart your computer
- Use a VPN
- Temporarily disable your antivirus
- Allow Twitch through the Windows Firewall
- Clear browser cache and cookies
- Disable browser extensions/add-ons
- Reset browser settings
- Switch to an alternative browser
- Switch your DNS
1. Check your network connection
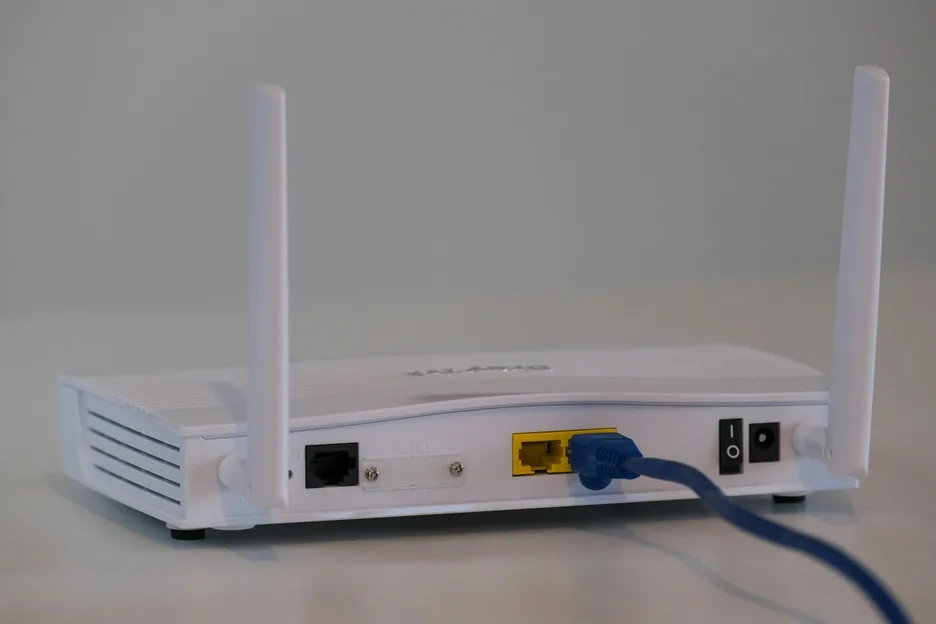
Twitch needs a stable, high-speed connection. If your internet is slow or unstable, Twitch will pause, buffer, or drop quality.
You can check your connection speed using any speed test tool. If your speed score is low, you can try the following tips to improve your internet connection:
- Close any unused apps that may be using bandwidth.
- Restart your router or modem if they’re working for a long time.
- Remove other devices connected to your network.
- Switch to a wired connection if you’re using a wireless network, as an Ethernet cable is more stable in most cases.
- Contact your Internet Service Provider for further assistance if it turns out to be a connectivity issue.
2. Restart your computer
A simple restart clears temporary system bugs and frees up RAM. If your computer’s been on all day (or all week), background apps and temporary bugs can slow everything down.
Restart your PC, then open Twitch again to check if the lag is gone.
Still buffering? Try the next fix below.
3. Use a VPN
Streaming can take up a lot of bandwidth, and to prevent network congestion, some ISPs slow down streaming traffic (called throttling).
That means Twitch gets slowed down on purpose. This is where a VPN can help. A VPN hides what you’re doing online, so your ISP can’t selectively slow Twitch. It can also help if Twitch is restricted at school, work, or in certain regions.
Not all VPNs are fast enough for streaming, though. Popular, reliable options include:
It’s easy to use a VPN with Twitch. We’ll use NordVPN for this tutorial (because it’s our favorite VPN), but other VPNs work in much the same way.
- Go to the NordVPN official website.
- Download and install NordVPN.
- Click the Quick connect button at the bottom of the map, and then the app will automatically choose a server that suits you best.
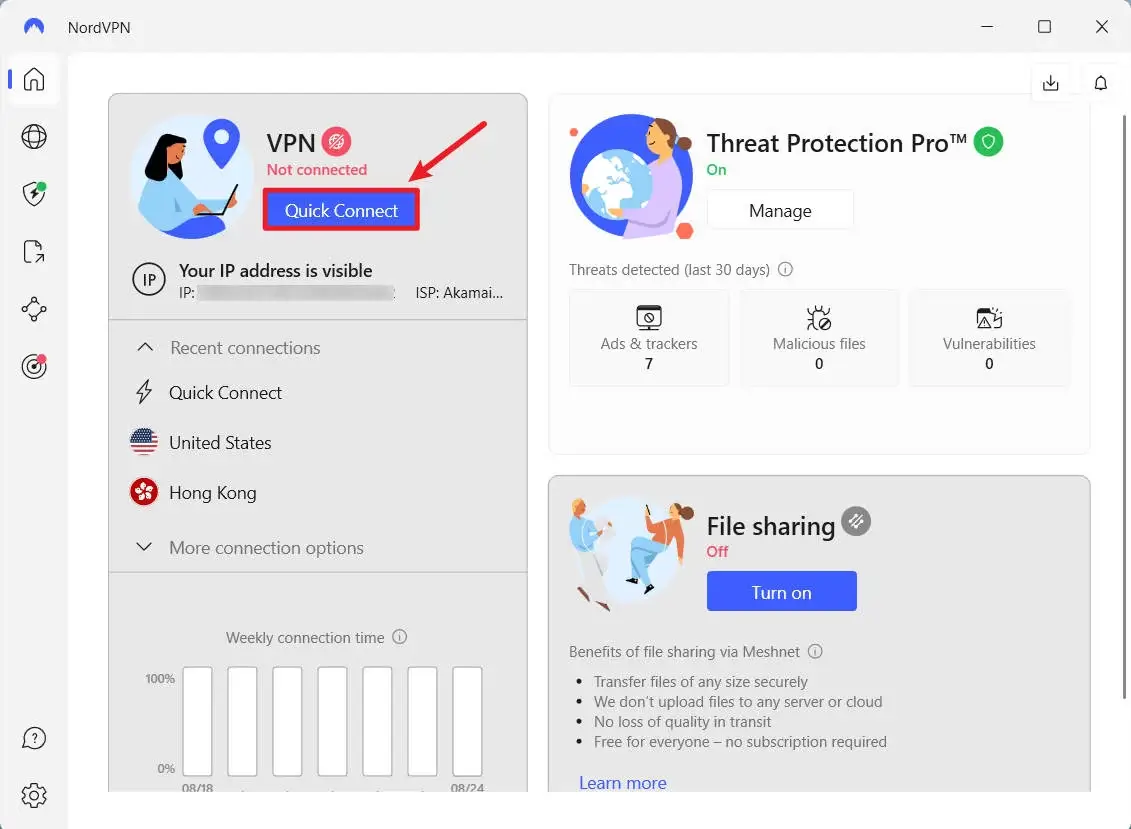
- Go to Twitch.
If the stream suddenly runs smoother, you’ve found the problem.
4. Temporarily disable your antivirus
The Twitch lagging issue is sometimes caused by interference from antivirus software. To see if that’s the problem for you, temporarily disable your antivirus program and firewall and check if the problem persists. (Consult your antivirus documentation for instructions on disabling it.)
If Twitch works fine afterward, your antivirus is likely the cause.
You can contact the antivirus provider for advice, or switch to a different solution.
Just be careful while protection is off. Don’t download random files or click sketchy links.
5. Allow Twitch through the Windows Firewall
Windows Firewall can quietly block apps without you realizing it.
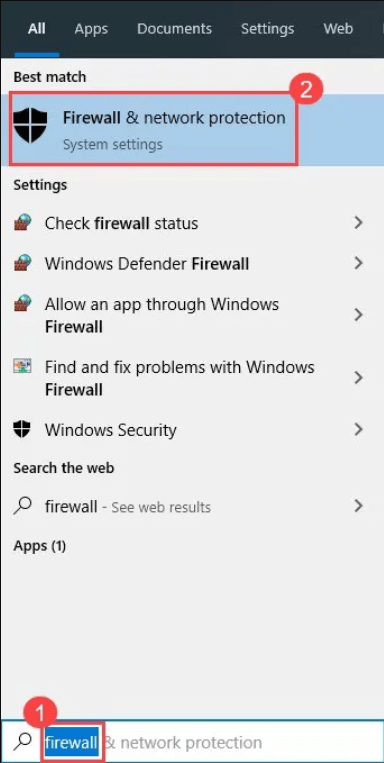
Follow the instructions below to allow Twitch through the Firewall settings:
- Press the Windows logo key on your keyboard, type firewall then click Firewall &network protection.
- Click Allow an app through firewall.

- Scroll down to check if the Twitch app is on this list. If yes, make sure both Private and Public boxes are checked.
If you can’t find Twitch on the list, then it may not have been allowed to get through your firewall. To manually add the Twitch app through Firewall:
- Click Change settings
- Click Allow another app > Browse.
- Select Twitch.exe, then click Open. (You can locate the Twitch.exe by right-clicking the Twitch icon on the desktop, then select Open file location.)
- Click Add.
Once that’s done, restart Twitch and test again.
6. Clear browser cache and cookies
Old or corrupted cache files often cause loading errors, video freezing, and login issues on streaming sites. If you haven’t cleared your cache in a while, do this:
- Open your browser.
- On your keyboard, press the Ctrl, Shift, and Del keys at the same time.
- Choose the time range “All time“, check the box next to Browsing history, Cookies and other site data, and Cached images and files, then click Delete data.
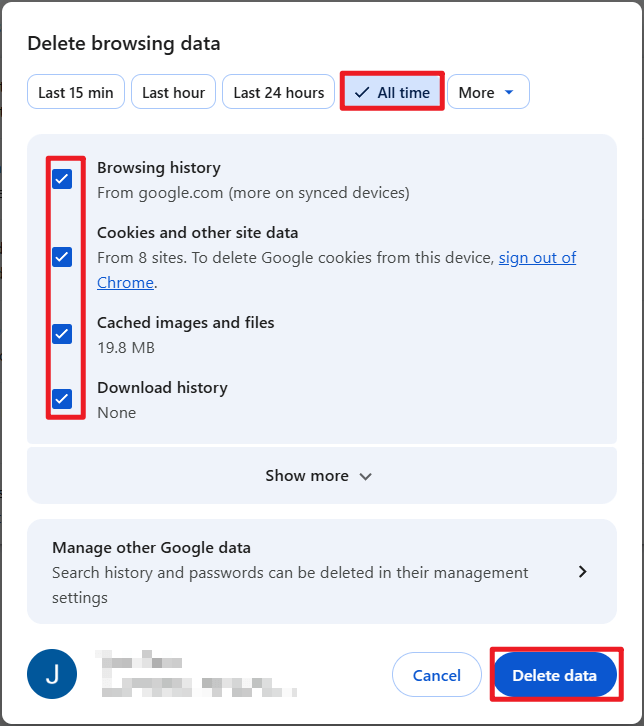
Reopen your browser and Twitch to test the issue. If the Twitch lagging issue persists, then try the next fix below.
7. Disable browser extensions and add-ons
Sometimes, certain browser extensions or add-ons might conflict and cause lag issues when streaming. To see if this’s a compatibility issue, try disabling extensions. Here’s how to do this if you’re using Google Chrome:
1. Open Google Chrome.
2. Click the Menu button, select More tools, and then select Extensions.

3. Click the toggle to disable your extensions one by one, reopening Twitch each time to check if your problem is caused by any of these extensions.
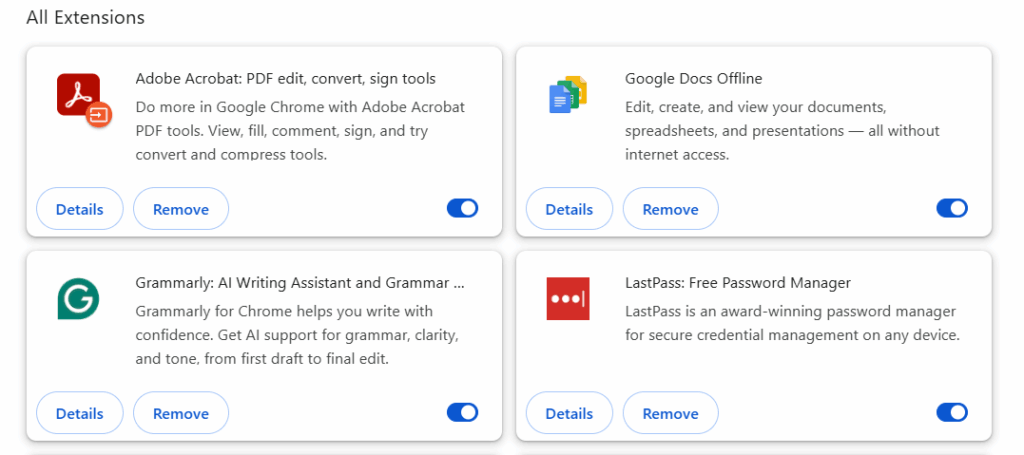
If Twitch works properly after you disable a specific extension, contact the developer about an upgrade or bug fix.
8. Reset browser settings
Improper browser settings can also cause streaming issues like video lag. To fix this, try resetting your browser settings. Here’s how to reset Google Chrome settings to default:
- Open Google Chrome.
- Type chrome://settings/reset in the address bar and press Enter.
- Select Restore settings to their original defaults.
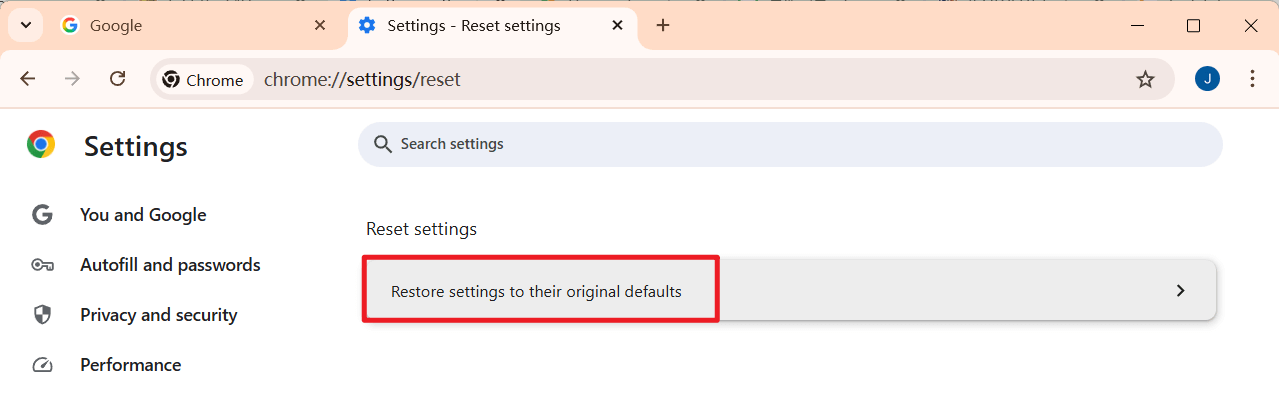
- Click Reset settings. This won’t delete your bookmarks, just the settings.
Relaunch your browser to see if this worked for you.
9. Switch to an alternative browser
Your browser’s general privacy settings can also cause Twitch streaming issues. To see if that’s the case for you, try using an alternative browser, such as Edge, Firefox or DuckduckGo, to see if the issue still exists.
10. Switch your DNS
If Twitch constantly lags, it can be a DNS issue, particularly if you’re using the ISP’s (Internet Service Provider) default DNS or the router’s DNS. To fix this, you can switch to Google’s public DNS (8.8.8.8 and 8.8.4.4). Follow the instructions below:
- On your keyboard, press the Windows logo key and R at the same time to open the Run dialog box, then type ncpa.cpl.
- Right-click Ethernet, then select Properties.
- Click Internet Protocol Version 4 (TCP/IPv4) > Properties.
- Click the option button next to Use the following DNS server addresses, then enter 8.8.8.8 as the Preferred DNS server and 8.8.4.4 as the Alternate DNS server.
- Restart your computer and Twitch to test the issue.
Twitch lag is annoying, but it’s rarely permanent. I hope one of these methods helped you fix your Twitch lagging or buffering issues. If you still experience problems, feel free to drop a comment.
Leave a Reply