
You’re just trying to open a shared folder. And then, Windows hits you with this message: “The specified network name is no longer available.”
This issue is common on Windows systems and is usually related to network settings, SMB protocols, or security software blocking the connection.
The good news is that this problem is fixable. Here are several proven solutions you can try. You don’t need to try them all; just work through the list until something works.
Fixes to try:
- Temporarily Disable Your Antivirus Software
- Enable SMB 1.0
- Enable the Computer Browser, Server, and Workstation Services
- Map the Network Drive Using the IP Address
1. Temporarily Disable Your Antivirus Software
Let’s start with the easiest thing to test.
Antivirus software may block you from accessing the shared resources. Symantec Endpoint Protection was known to have a bug causing “The specified network name is no longer available” error before. To see if that’s the problem for you, temporarily disable your antivirus and check if the problem persists. (Consult your antivirus documentation for instructions on disabling it.)
If this resolves the problem, contact the vendor of your antivirus software and ask them for advice, or install a different antivirus solution.
IMPORTANT: Be extra careful about what sites you visit, what emails you open, and what files you download when your antivirus is disabled.
2. Enable SMB 1.0
Here’s something Windows doesn’t tell you upfront.
Many older servers, NAS devices, and networked machines still rely on SMB 1.0, an older file-sharing protocol. Modern versions of Windows (especially Windows 10 and 11) disable it by default for security reasons.
If your shared device only supports SMB 1.0, Windows simply won’t connect.
To enable it:
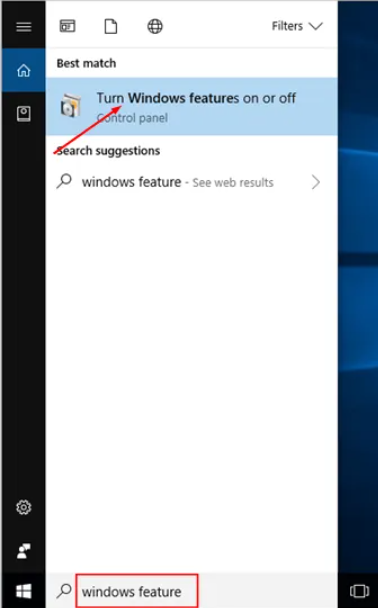
1. On your keyboard, press the Windows logo key, type windows features into the search box, then click Turn Windows features on or off.
2. Scroll down to SMB 1.0/CIFS File Sharing Support. Check the box next to it, then click OK.
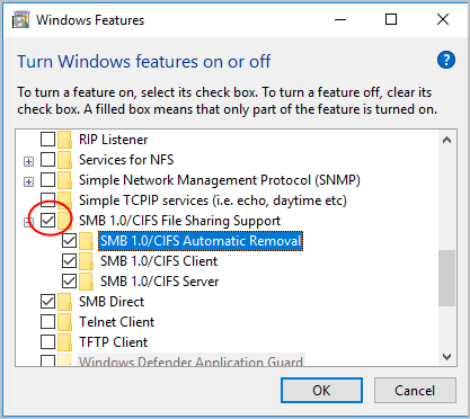
3. When prompted Windows completed the requested changes, click Restart Now.
After your PC reboots, check to see if the problem persists.
3. Enable services Computer Browser, Server & Workstation
These Windows services handle network discovery, file sharing, and SMB connections. If any of them are stopped or disabled, you may not be able to access shared resources.
Here’s what each service does:
- Computer Browser: Maintains an updated list of computers on the network and supplies this list to computers designated as browsers. If this service is stopped, this list will not be updated or maintained. If this service is disabled, any services that explicitly depend on it will fail to start.
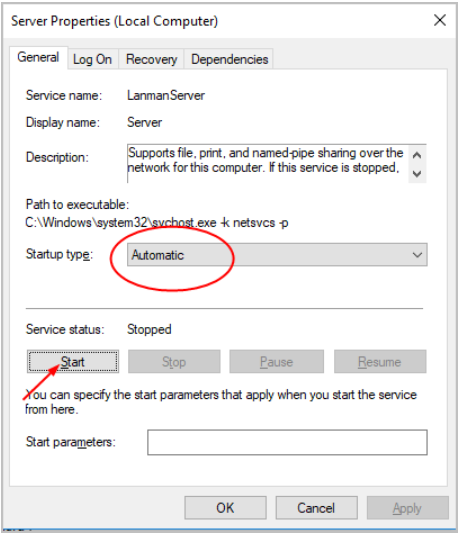
- Server: Supports file, print, and named-pipe sharing over the network for this computer. If this service is stopped, these functions will be unavailable. If this service is disabled, any services that explicitly depend on it will fail to start.
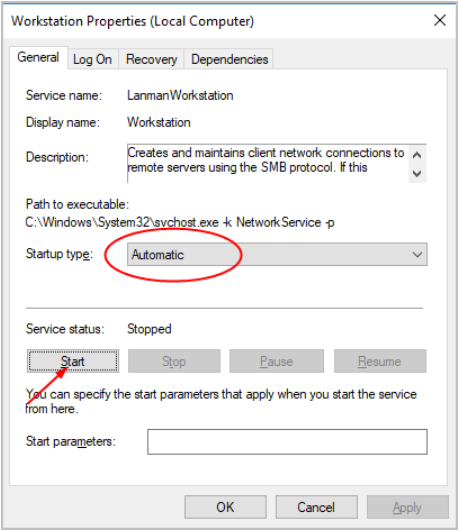
- Workstation: Creates and maintains client network connections to remote servers using the SMB protocol. If this service is stopped, these connections will be unavailable. If this service is disabled, any services that explicitly depend on it will fail to start
If these services aren’t running, Windows cannot properly communicate with network devices. Here’s how to check:
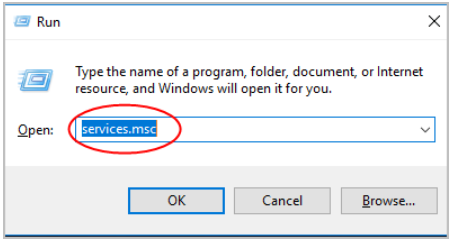
1. On your keyboard, press the Win+R (Windows logo key and R key) at the same time to open the run box.
2. Type services.msc and click OK.
3. Double-click Computer Browser. Under the General tab, select the Startup type to Automatic, and click Start. Then click OK.
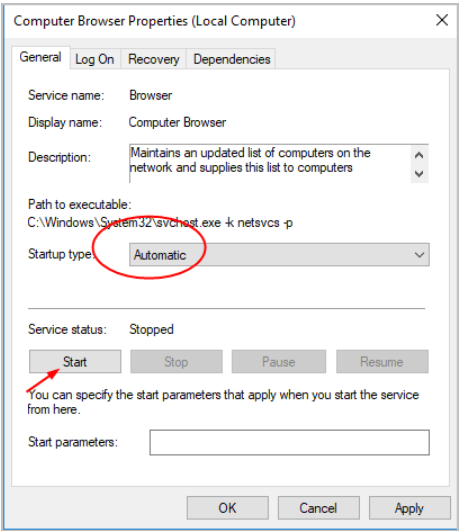
4. Do the same for Server.
5. Repeat for Workstation.
Restart your PC and test the network connection again.
4. Map the network drive using the IP address
Network name resolution (DNS or NetBIOS) may fail, causing Windows to lose the path to the shared resource. Using the IP address instead of the computer name bypasses this problem.
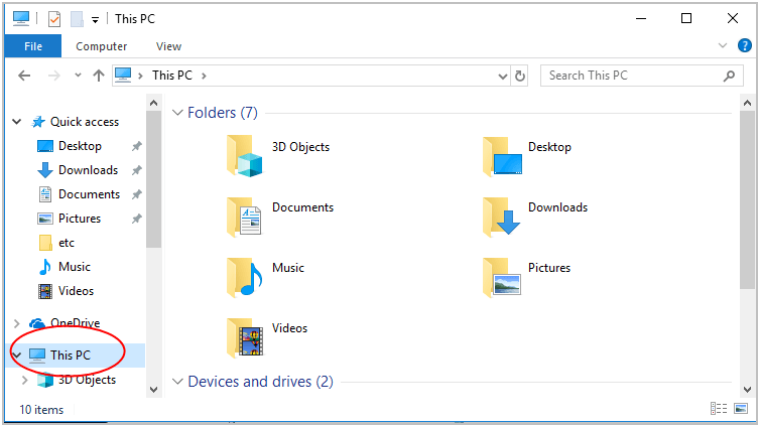
1. Open File Explorer and access This PC.
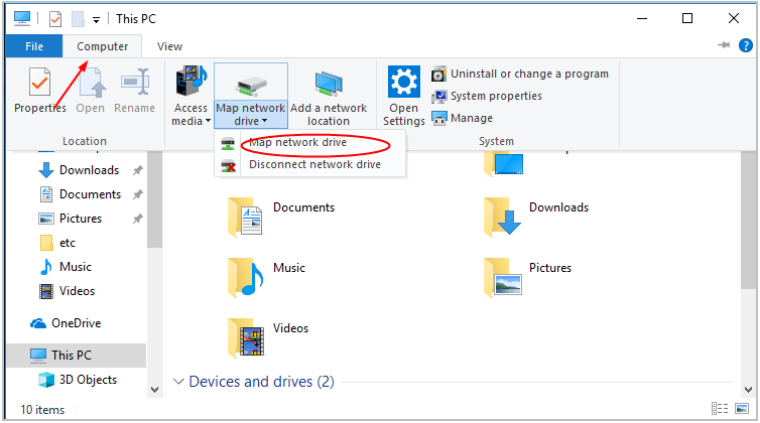
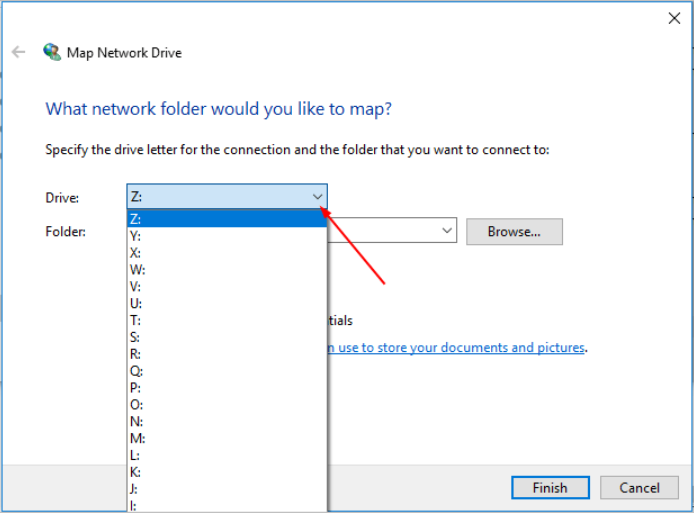
2. Click Computer, then click Map Network Drive.
3. In the Drive section, pick any drive letter.
4. In the Folder section, enter the address of the shared folder you wish to access. The address would be like: \\IP address\share folder.
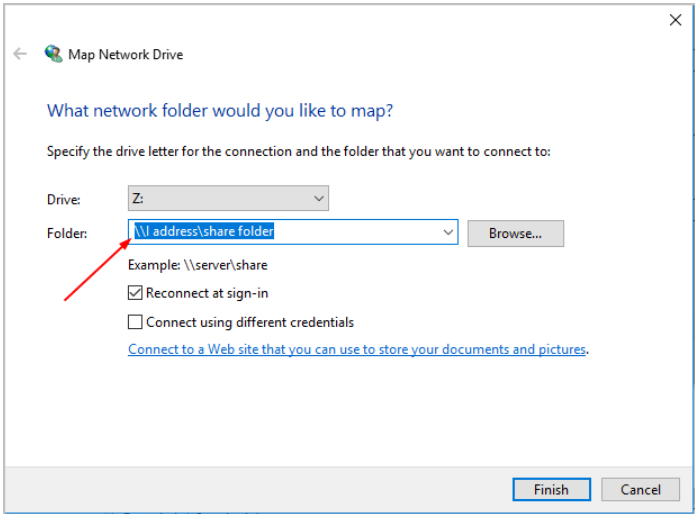
5. Click Finish and check to see if the problem persists.
If this works, you know the issue was name resolution, not the network itself.
Final thoughts
“The specified network name is no longer available” sounds scary, but it usually comes down to antivirus interference, missing SMB support, disabled Windows services, or a simple name-resolution hiccup.
Work through these fixes one by one, and in most cases, the problem disappears.
If you’re still stuck or if you’re dealing with a specific device, NAS, or Windows version, feel free to leave a comment below. I’m happy to help you dig a little deeper.
Leave a Reply